Traveloot Getting Started Guide
Workstation, guild, early forest runs, first recruits, and smart upgrade priorities.
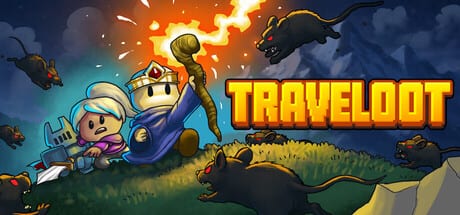
Traveloot drops you into a run-based incremental loop almost immediately: your adventurers walk the route on rails while you aim the cursor to deal damage and scoop loot. This getting-started guide is the first-hour plan for the full release (four islands, eight adventurers). Follow it if you just launched from Steam or itch, or if a demo save left you unsure what to buy next.
If aiming, drag, or the upgrade tree already feel wrong, skim Controls first, then come back. For a hub map of every how-to on the wiki, return to the Guides Hub.
Minute zero — what the game expects
Your party moves automatically. You do not kite with WASD in the field; WASD and right-click drag are for panning menus and the upgrade tree. In a run, Left Click interacts and attacks through the cursor. Loot only counts when it enters the magnet / pickup box around that cursor, so early magnet upgrades are not a luxury — they are the difference between finishing a zone rich or finishing it broke.
Casual Mode exists if the damage checks feel harsh while you learn the economy. Use it to learn routes, then switch back when you want the full pressure of gauntlets. Either way, treat the first session as infrastructure: workstation throughput, guild capacity, and a tiny magnet investment beat a shiny damage node you cannot feed with wood and gold.
Repair the workstation before you chase bosses
Early dialogue and quests push you to gather wood and help repair the workstation. Do that. A working workstation raises how much you can convert from each run into permanent power. Skipping it to force a harder zone usually means you bank less per minute and stall harder later.
Practical loop:
- Clear the safest forest zone you can finish reliably.
- Spend wood (and early gold) into workstation and basic economy nodes.
- Re-run the same zone once with the new throughput instead of immediately forcing the next skull icon.
Logs and stone show up soon after; diamonds stay scarce and should not be spent on vanity. Save diamonds for magnet tiers, key guild unlocks, or nodes that permanently raise pickup or party quality. Details live in the Farming Guide.
Fund the guild — slots and recruit hints
The guild is the social and mechanical hub of Traveloot. Upgrading it matters for two reasons: you need party slots and quality-of-life as the roster grows, and NPCs in the guild drop hints about how to find hidden adventurers later. When someone mentions a cactus, a quiet path, or a healer-only approach, write it down — those lines unlock desert recruits covered in the Islands Guide.
Early guild investment also makes it easier to rotate Mage, Carpenter, Hermit, and Liora without feeling locked into a bad four-stack. Party size is limited even when eight adventurers exist, so the guild is where you decide who sits out.
Early forest zones (1-1 through the mid-1s)
Forest routes teach the core skills: keep the cursor on dense enemy packs, sweep dropped wood and gold before they despawn off-screen, and abort a greed swing if the shared health pool is melting. Zones labeled like 1-1, 1-2, and 1-3 are your tutorial economy. Completing them is good; farming them after clear is better until workstation and magnet feel comfortable.
Expect Carpenter to appear around the early mid-forest stretch (players often meet the recruit beat near zone 1-2 content). Liora (also referred to as Luna in older community notes — she is the healer) shows up shortly after as you push deeper. Recruit both. Carpenter accelerates resource and facility progress; Liora keeps the shared health pool alive when you start taking gauntlet spikes or invite a co-op partner.
First recruits — Carpenter and Liora
Carpenter is your early economy multiplier. Slot them when wood and build quests dominate the log. Their kit supports the workstation fantasy: more materials in, more permanent upgrades out. If you are choosing between a pure damage hire and Carpenter during the wood-gated stretch, take Carpenter.
Liora is the safety net. Bring her when a zone’s chip damage or elite bursts start ending runs. In co-op she frees the second player to focus on loot vacuum duty — see Couch Co-op. Solo, she lets you hold the cursor on high-value packs instead of panic-kiting the aim point away from loot.
Mage and Hermit round out the early known roster. Mage covers reliable damage; Hermit leans into pickup and wild-growth style value that makes re-runs lucrative. Wizard, Druid, Knight, and the remaining full-game recruits arrive as you leave pure forest content — do not soft-lock yourself hunting them before the guild and magnet are online.
Magnet first, then smart damage
New players overspend on damage because kills feel like progress. In Traveloot, uncollected loot is wasted progress. Magnet upgrades enlarge or strengthen the cursor vacuum so wood, gold, stone, logs, and diamonds actually bank. A slightly slower clear that vacuums everything beats a fast clear that leaves half the ground sparkling. When you want a deeper vacuum drill and Hermit pairing, continue on Magnet & Cursor.
Priority heuristic for the first hour:
- Workstation / economy nodes that raise resources kept per run.
- Magnet and pickup quality-of-life.
- Enough damage and defense to keep clear times reasonable.
- Guild slots and recruit-enabling upgrades.
- Speculative deep-tree damage only after 1–3 feel trivial.
Revisit the tree with pan/zoom (Right Click drag or WASD) so you do not buy a leaf node while missing a trunk economy upgrade. Controls covers tree navigation and Mac trackpad quirks.
Economy versus damage — a concrete example
Suppose zone 1-3 is clearable but messy: you win with 30% health and leave coins on the ground. Buying another attack node might shave ten seconds. Buying magnet plus a wood node might double what you deposit. The second choice unlocks Carpenter-powered facilities faster, which then buy the damage node and the next island push. That is the Traveloot flywheel.
Diamonds from milestones and rare drops should reinforce that flywheel, not impulse-buy cosmetic power. Check milestones after each session — they are an intentional diamond faucet called out by players who cleared early content — and use Milestones & Diamonds for the spend order once payouts start stacking.
First-hour checklist
- Finish the onboarding prompts and repair the workstation with wood.
- Put early gold into economy and magnet before luxury damage.
- Clear and then farm 1-1 / 1-2 until runs feel automatic.
- Recruit Carpenter; slot them for resource-heavy loops.
- Recruit Liora before attempting spike-heavy or gauntlet-style maps.
- Talk to guild NPCs and note any recruit riddles for later islands.
- Confirm Casual Mode setting matches the pace you want tonight.
- Bookmark Farming Guide and Islands Guide for the second session.
What success looks like by hour two
You should have a repaired workstation, a guild worth checking every lobby, Carpenter and Liora unlocked, a magnet tier that makes loot feel sticky, and a forest farm route you can run half-asleep. Party compositions for later content belong on the Players Hub and Tier List Hub; your job in hour one is simply to stop leaking resources and to unlock the systems that make every future run stronger.
When forest farms feel solved, push toward desert content, watch for hidden Druid and Knight conditions, and only then start theorycrafting eight-adventurer rotations. Until that point, this guide plus disciplined re-runs will outpace any guide that tells you to rush the final island.
Frequently Asked Questions
Quick answers to the most common Traveloot questions.
What should I upgrade first in Traveloot?
Prioritize workstation and economy nodes, then magnet and pickup quality-of-life, then enough damage to keep clears comfortable. Deep damage leaves without magnet usually waste loot.
When do Carpenter and Liora show up?
Carpenter appears during early forest progression (often around the 1-2 stretch). Liora, the healer, follows as you push the next forest zones. Recruit both before hard gauntlets.
Is Casual Mode worth using as a beginner?
Yes if you want to learn routes and the upgrade tree without repeated wipe stress. Switch back to standard difficulty once magnet and guild basics feel natural.
Should I re-run cleared forest zones?
Absolutely. Cleared early zones are your best wood and gold printers until the workstation and magnet catch up. Pushing a skull icon undergeared is slower overall.
Where do I learn controls and co-op roles?
Read the Controls guide for mouse, gamepad, and upgrade-tree pan/zoom. Read Couch Co-op before inviting a friend onto the shared health pool.